Photography Guide
How to Photograph Mountains
Practical technique from the trail, and how to get better mountain photos with the camera you already own.
Mountains are easy to photograph badly. The scenery does so much of the work that it's tempting to raise the camera, shoot, and trust the view to carry the frame. Then you get home and the photos don't look like the place felt. The sense of scale is gone, and the peak that impressed you sits in the middle of the frame as a grey shape.
This guide is about closing that gap. I've photographed mountains across the Dolomites, Arctic Norway, the Alps and Taiwan, mostly on foot and in whatever light the day gave me. The camera has rarely been the thing that made a photo work or fail. Where I stood and what I did in editing mattered far more.
So this is a technique guide first. I'll cover gear where it changes the result and point out the few things worth carrying, but the aim is to help you take better mountain photos with the kit you already own. I shoot a Fujifilm X-T5 for digital and a Fuji GSW690 for medium format film, and I'll mention both, but nothing here depends on owning either. The approach carries to whatever camera you own.
On this page:
Section 01 | When to shoot: light and weather
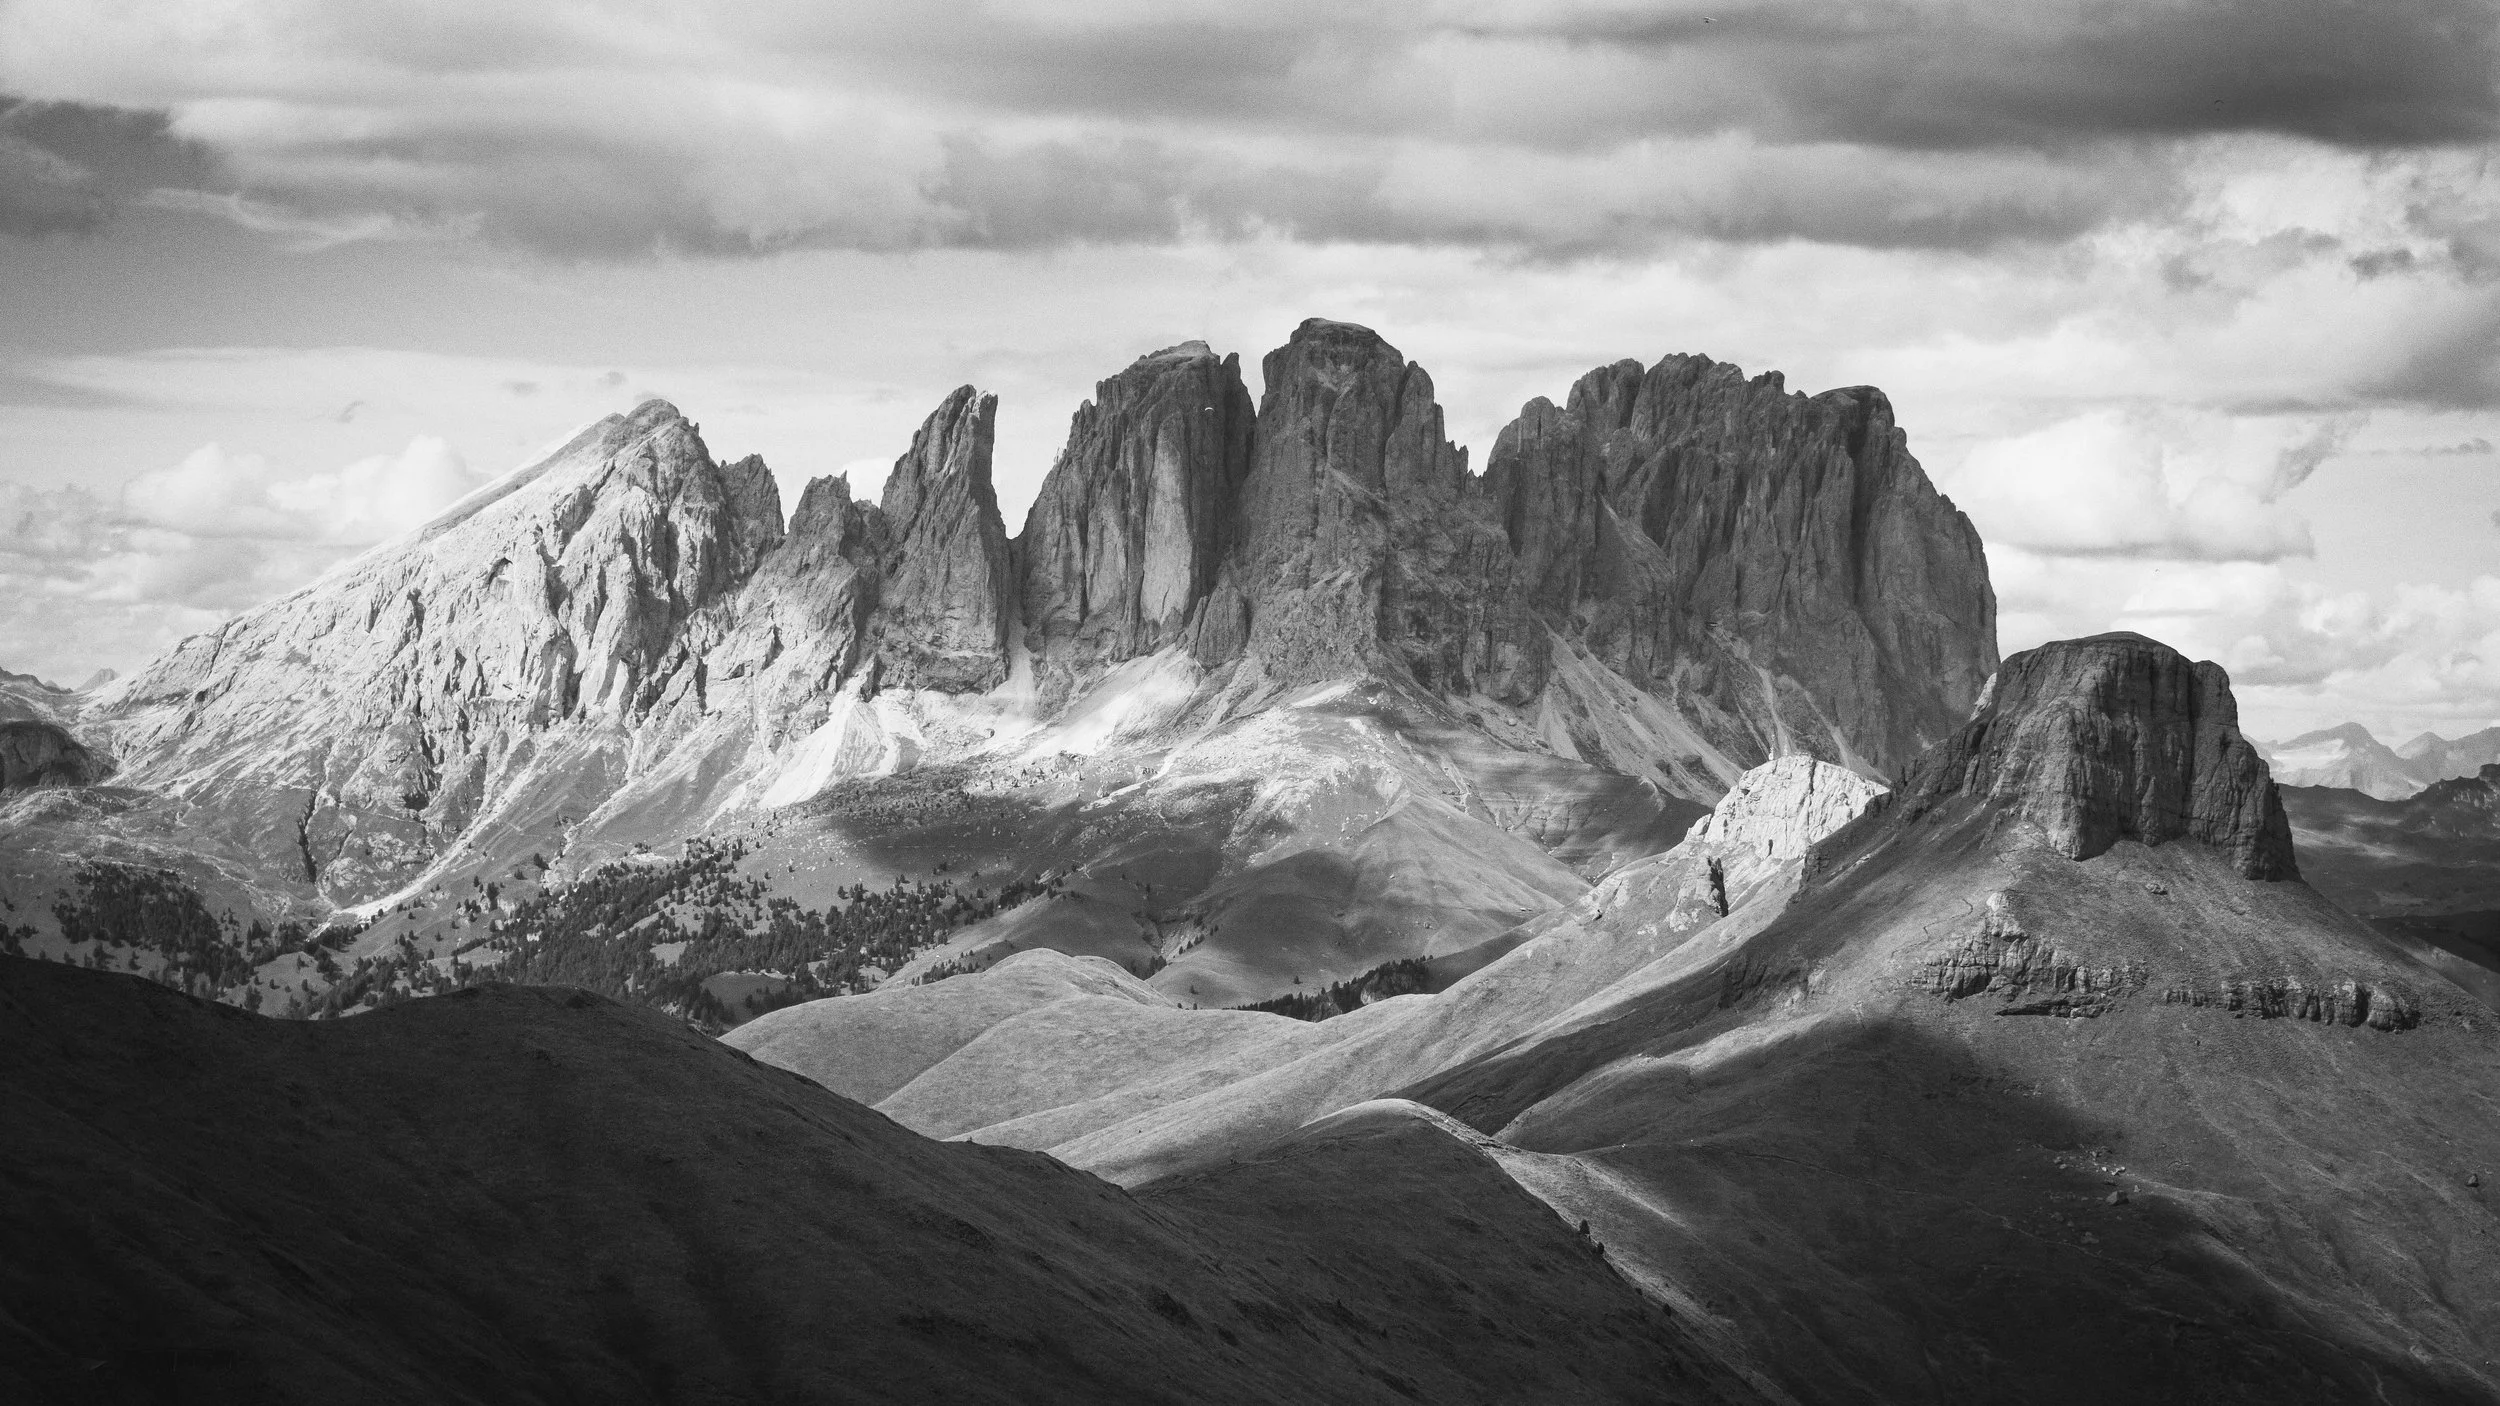
Grohmannspitze, shot in harsh midday light. Flat overhead sun and a hazy sky gave little to work with in colour, so black and white does the job instead, leaning on the shape of the ridge against the sky. More on this in section 5.
Fujifilm X-T5 | Acros Film Simulation
Light does more to a mountain view than anything else you can control. The same ridge looks ordinary at midday and absolutely stunning an hour after sunrise, so timing is the part most worth planning around.
Shoot at the edges of the day. Low, angled light is doing two things at once. It rakes across the terrain so ridges, gullies and folds throw shadows, and those shadows are what give the rock its shape and structure in a photo. The same face lit flat from overhead looks like a wall; lit from the side at a low angle it has depth and form. Low light also warms the colour, turning the rock gold where the sun catches it. So sunrise and sunset change both the structure of the image and its colour, which is why a location can look unremarkable in the middle of the day and worth the trip an hour after dawn. Some rock holds that warm light especially well, the pale Dolomites being one example, but the effect is there on any mountain.
The sky is where a lot of the drama comes from. A good sky can be responsible for a large share of what makes a mountain photo work, and a dramatic one is usually what you're hoping for. Cloud gives the frame something to happen in: texture, movement, light breaking through, weather rolling across a ridge. It also creates dynamics a clear sky can't, because an empty blue sky tends to sit flat and lifeless above the landscape and gives the eye nothing. So don't wait for clear weather. Mist off a valley or cloud dragging over a peak as a storm clears will do more for a photo than a cloudless morning, and those are often the conditions you'd rather stay in for.
If you're stuck with clear skies or midday sun, don't give up. Flat overhead light and an empty sky are the hardest conditions to make something of, but on a hike you're usually there for that one moment and won't get to come back for better light. So change your approach rather than writing the shot off. Black and white can rescue a flat, hazy scene by leaning on shape and contrast instead of colour and sky. Composition can carry a frame that the light won't, and careful editing can recover some of what the conditions took away. All three are covered later in the guide. The point for now is that bad light is a reason to work harder, not to put the camera away.
Section 02 | Where to shoot from: position and perspective
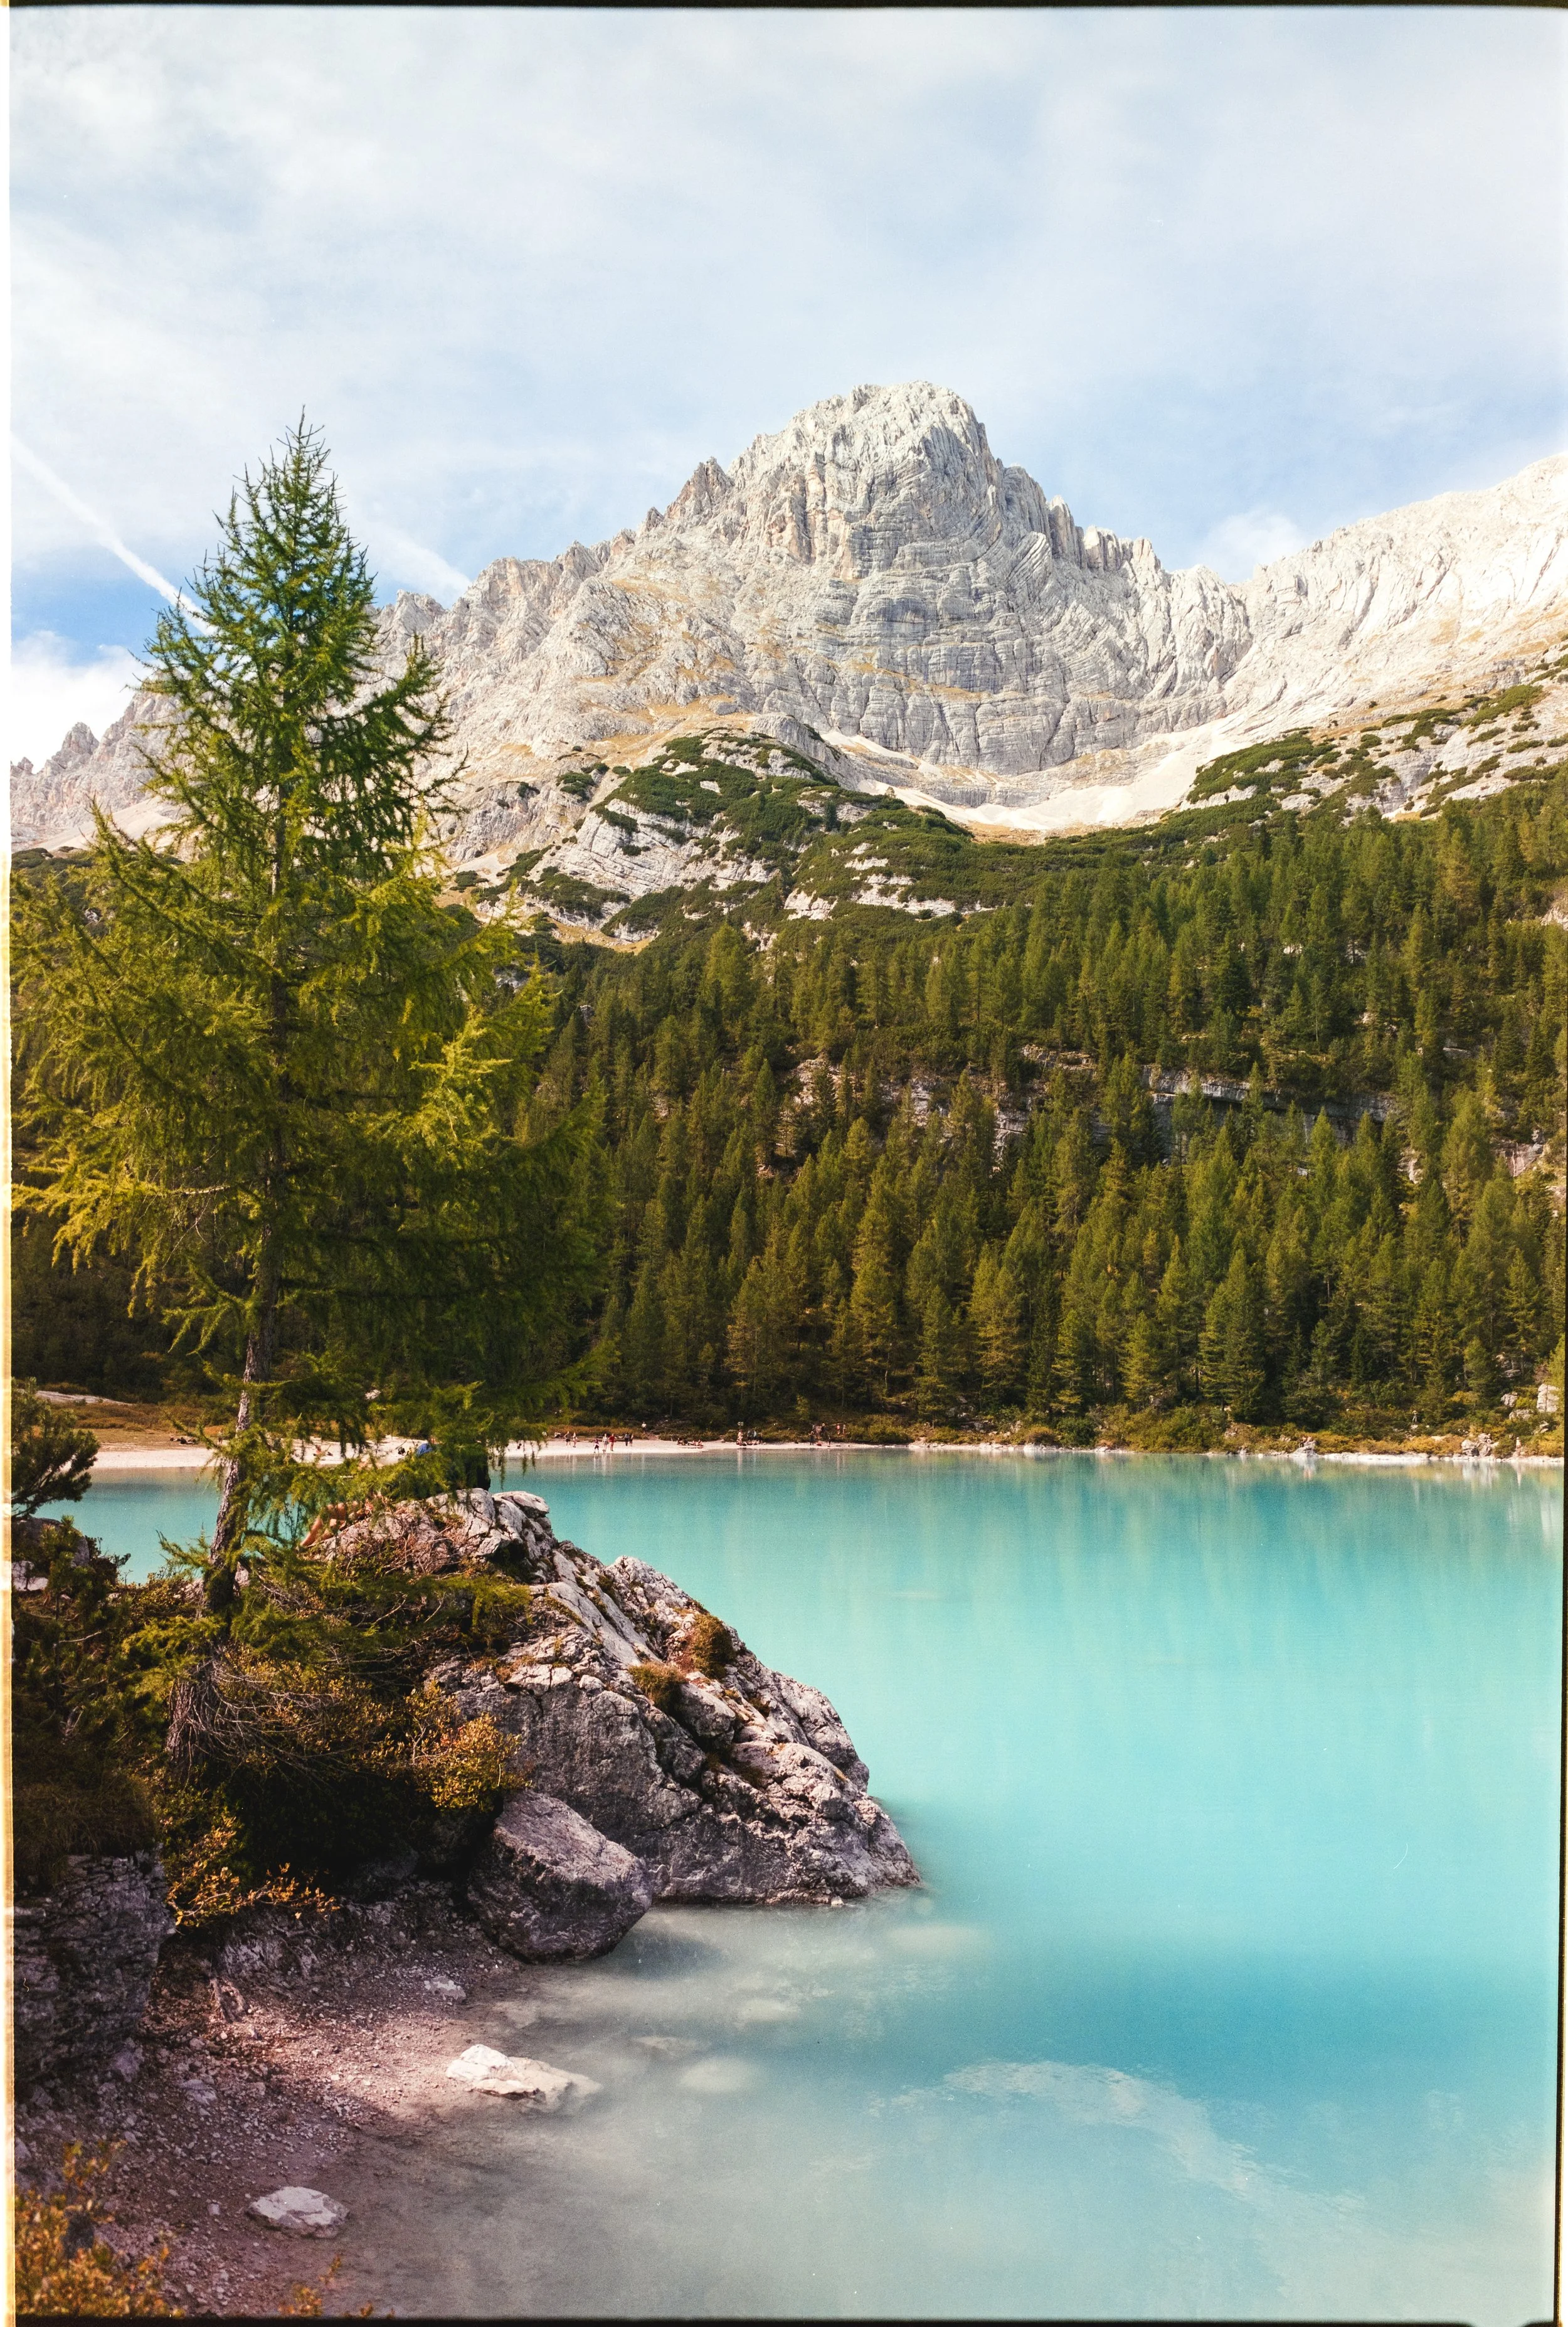
Lago di Sorapis, shot low to the near shore. The rock and lone tree give the frame a foreground, the lake leads the eye back, and the still water doubles the mountain behind.
Fuji GSW690 | Fujicolor Pro 400H
Once the light is right, where you stand is the next thing that determines the photo, and it's the part people get wrong most often in the mountains. Moving a short distance, or choosing a lower position, changes the image more than most people expect.
Shoot from below the peaks, not from the top of them. The instinct on a hike is to climb as high as you can and shoot from the summit, on the assumption that the best view is from the highest point. Photographically it's usually the opposite. From the top, everything around you sits at or below your eyeline, so the peaks lose their height and the view flattens into a distant panorama with nothing standing over you. From below, or partway up, the mountain rises above you and above the frame, and that is what puts its scale and mass into the photo. When a peak looks like it towers over the viewer, it's usually because the photographer was standing beneath it.
Give the frame a foreground. A mountain on its own, with nothing in front of it, tends to look flat and gives the eye no sense of how far away or how large it is. Something in the foreground fixes that: a band of rock, a stretch of water, a person on the trail, a line of trees. It gives the eye a way into the image and a reference for distance.
The mistake is grabbing the nearest thing without thinking, a random flower or a tree root, and dropping it in the bottom of the frame. You then can't decide what to focus on, and you end up with an odd shot where the foreground fights the mountain instead of supporting it. A foreground element has to work with the rest of the photo, either leading the eye toward the peak or fitting the frame as a whole. So it's worth looking around properly for the right element rather than using the first thing at your feet.
Look for layers. Mountains rarely sit as a single wall. They recede in ridgelines, one behind another, and on hazy or misty days the air between them separates each ridge into its own plane, lighter and fainter the further back it goes. That separation is one of the strongest ways to show depth and distance in a mountain photo, so when you see the ranges stacking back like that, position yourself to line them up. There's a lens technique that exploits this which I'll cover in section 3.
Use water. Lakes and tarns are worth building a composition around because they give you a foreground and a mirror of the peaks in one, and when the water is that vivid alpine blue or green, a strong colour anchor too. Get low and close to the near shoreline to use it as foreground, and on still mornings the reflection doubles the mountain in the frame. Lago di Sorapis and Lago di Fedaia in the Dolomites were two of the best examples I found, though any mountain lake is worth the effort.
Move before you settle. The first place you stop is rarely the best position, and small changes make a large difference. Step a few metres to line up a foreground element with the peak, crouch to strengthen the foreground, or climb a little to open a layer behind. It's worth working the spot for a few minutes rather than taking one frame from where you first stood.
Section 03 | Lens and framing
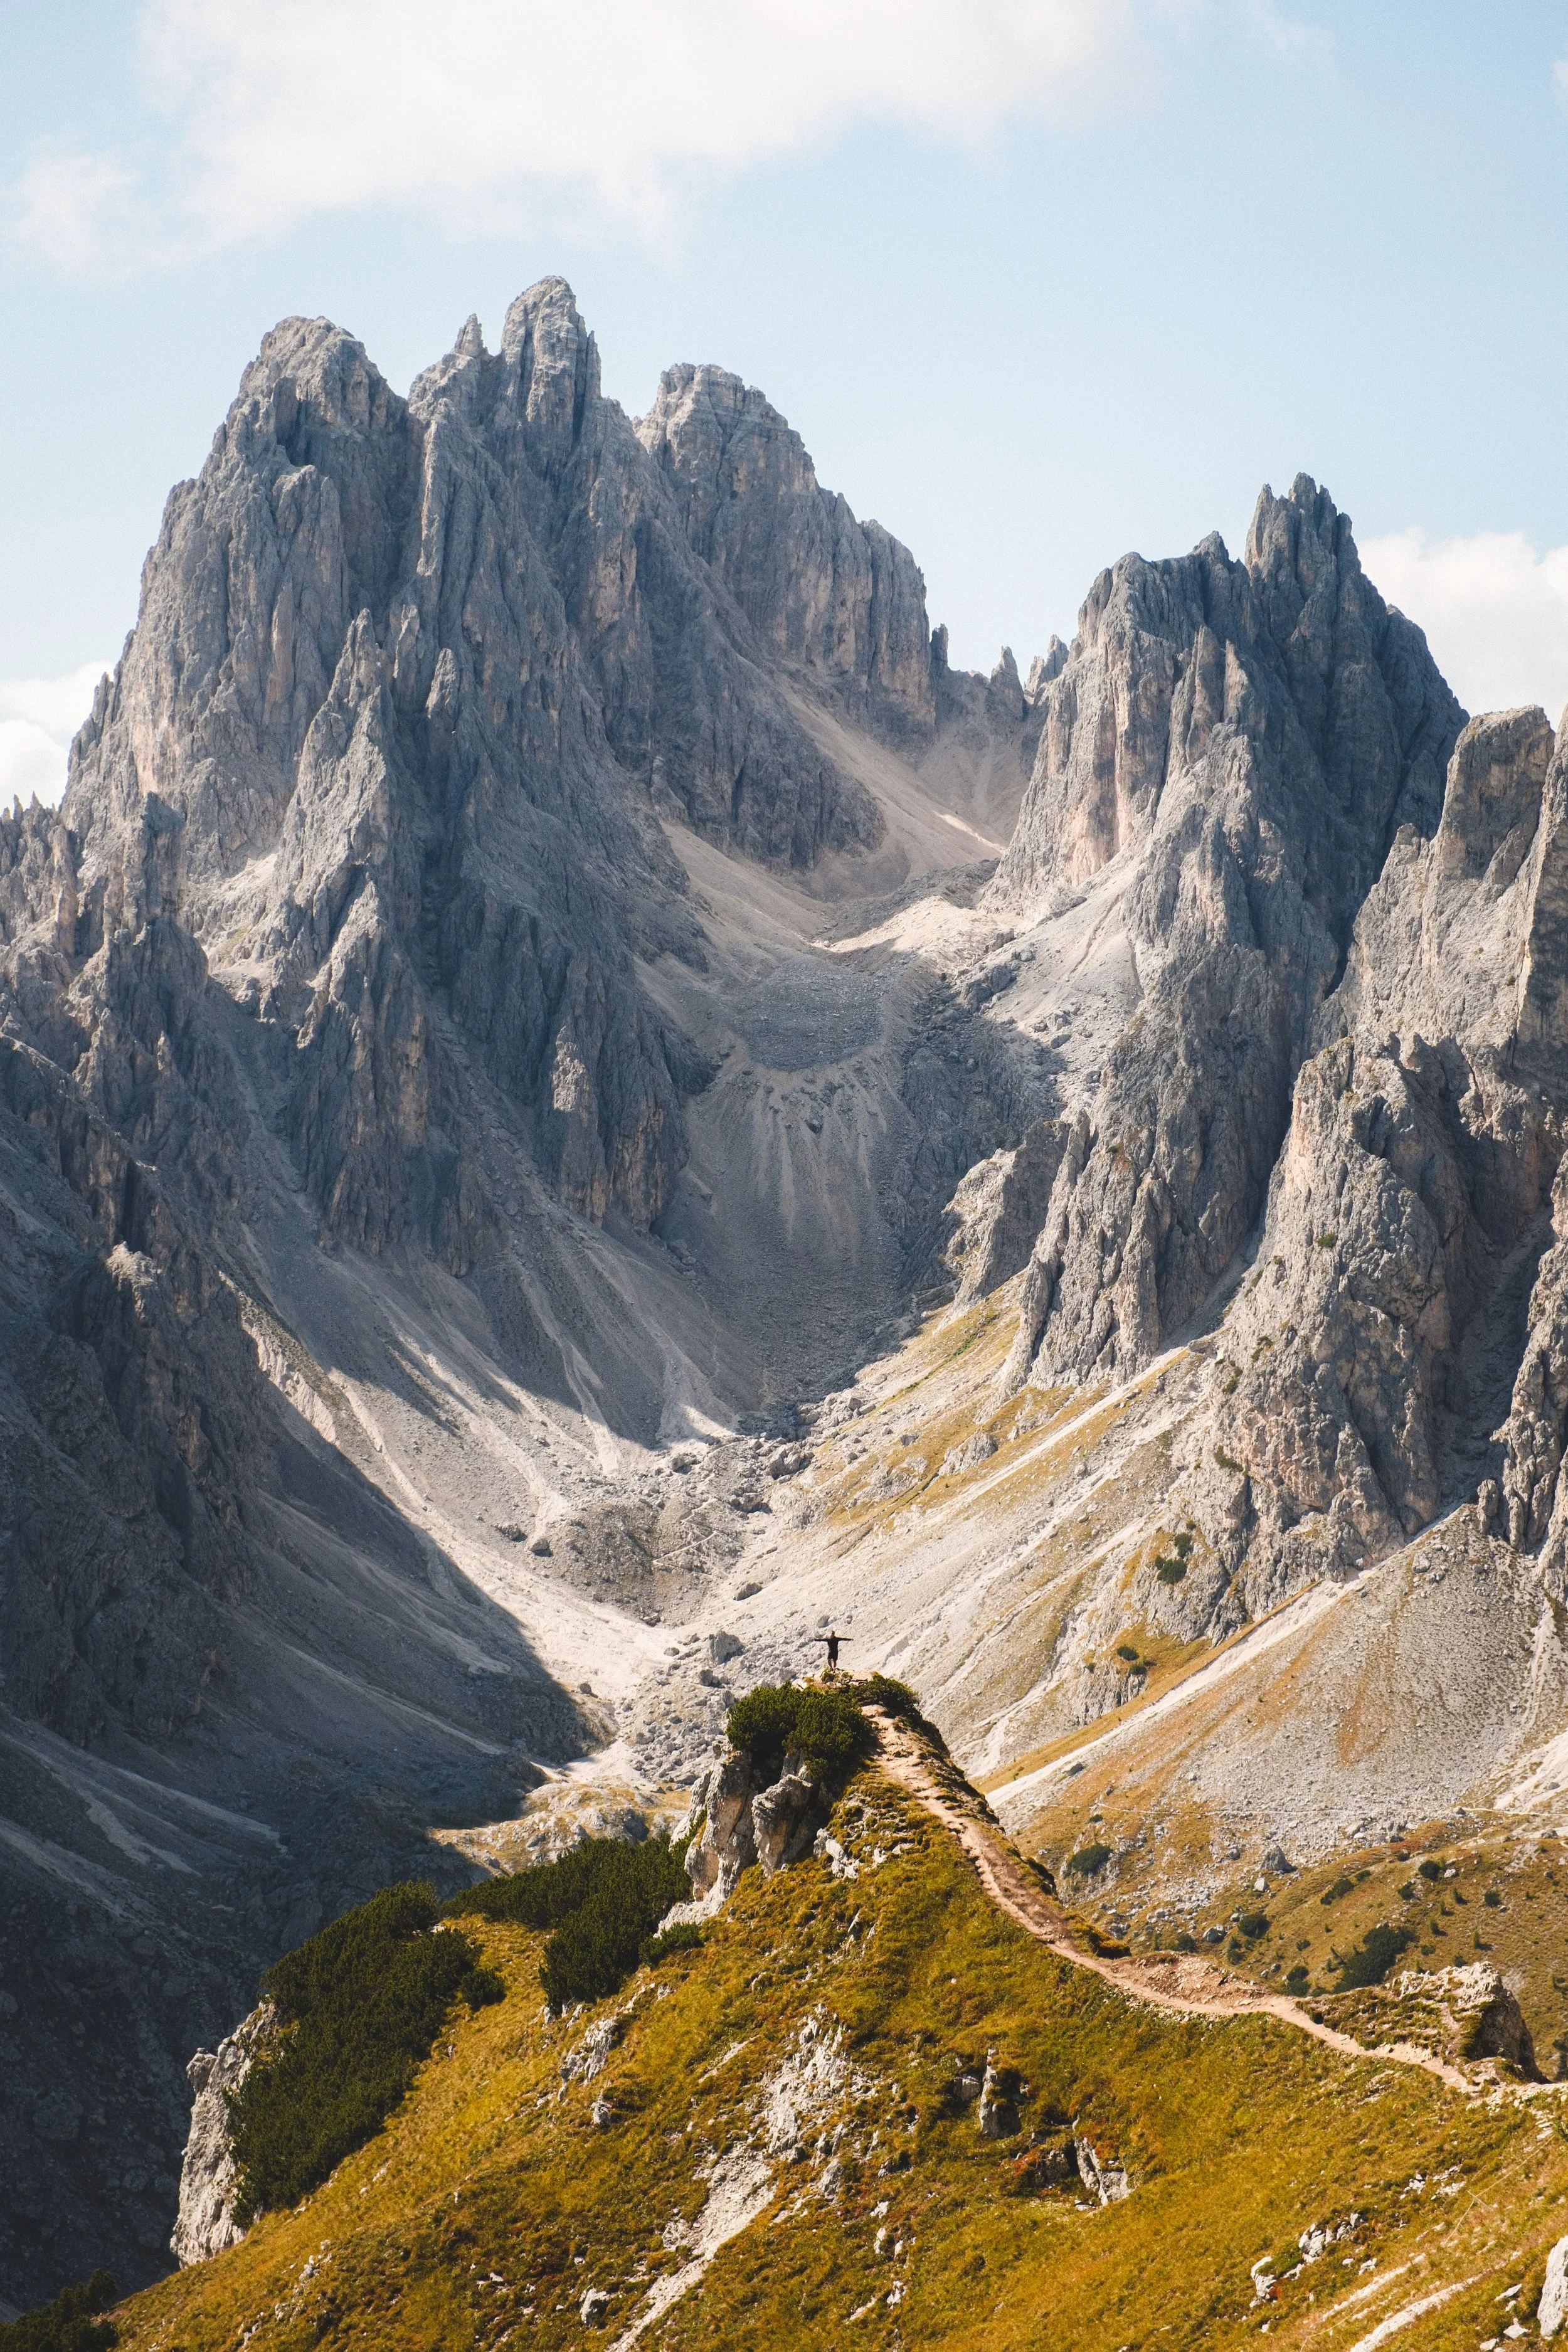
Shot on a longer lens, which pulls a section of the range in tight rather than trying to fit all of it. The lone figure on the ridge is what gives the scale away: read how small the person is and the size of everything around them lands. A slice of a mountain, shot this way, often works better than the whole panorama.
Fujifilm X-T5 | Reala Ace Film Simulation
Your choice of focal length has a big effect on how a mountain comes out, and it's worth understanding before you default to the widest lens you own. Reaching for the widest lens is the natural instinct, but it leaves one of the more useful mountain techniques unused.
Wide isn't automatically the answer. A wide lens takes in the whole scene and suits grandeur, sweeping foregrounds and tight spots where you can't step back. It can introduce scale, but it's tricky: it pushes distant peaks smaller and further off than they felt in person, so a big mountain often comes back looking flat. It also puts a lot in the frame, and a simple composition is almost always stronger, which is hard when the lens is pulling in everything in front of you. Wide works best when you have a strong foreground filling the space and a clean subject behind it.
Telephoto is the underused move. A longer lens compresses distance, stacking ridgelines and peaks against each other so they read as depth. It's often the shot that actually conveys a range, picking one peak or a set of overlapping ridges out of the wider view and letting them fill the frame. On a hazy day, when the air separates each ridge into its own plane, a telephoto lined up down that recession gives you one of the strongest mountain frames there is.
In practice, a decent zoom is all most people need. Given you're probably hiking and travelling with this kit, you don't need a bag of expensive glass. A single zoom covering wide to mid handles the vast majority of mountain shots, and it doesn't need to be fast or costly: you'll almost always be stopping down for front-to-back sharpness rather than opening up, and you're rarely after shallow depth of field in a landscape, so the wide aperture you pay a premium for mostly goes unused. Your kit lens is probably fine if the range is decent. I shoot almost all my mountain work on a Sigma 18-50mm f/2.8 on the Fuji (Buy Here), compact, sharp and inexpensive for what it does. I'll sometimes carry a 12mm (Buy Here) for wide effects and a telephoto (Buy Here) for compression, but to hike light they often stay at home.
Panoramas for the views a single frame can't hold. Some scenes are too wide for one frame, and a stitched panorama holds the sweep without forcing you onto an ultra-wide that would distort and shrink everything. Shoot a row of overlapping frames, keep exposure and focus consistent, overlap each by about a third, and stitch later. Handheld is fine, and it works especially well on a wide screen. I'll cover the stitching in the editing section.
Simplify the frame. Mountains give you so much to look at that it's easy to include too much and end up with no clear subject. Decide what the shot is about, one peak, one ridge, the lake and its backdrop, and compose to give it space. Looking for a simple composition is also a good way to work out where to stand: rather than hunting for five perfect layers, find the one clean subject and build the frame around it. Leading lines help too, a trail, a river or the edge of a lake drawing the eye up into the subject, which is another reason foreground and framing are the same decision.
Most of this comes from experience rather than rules. The more you go out and try it, the more you work out which compositions you like. So if you're not sure, the answer is to shoot: just by trying, you're learning what you're drawn to.
Capturing scale is the hardest part, and worth the most effort. The thing most easily lost is size. You stand under an enormous face, take the photo, and it comes back looking modest, because a mountain with nothing to measure it against has no scale at all. A few ways to put it back:
Include something of known size. A person on the trail, a rifugio, a car, a lone tree. The eye reads the familiar object, sees how small it is, and works out how vast everything around it must be. A single figure against a huge face is the clearest way to show scale there is.
Avoid an empty midground. A strong foreground and a distant peak with nothing between them leaves a hole the eye falls into. Something in the middle distance, even a band of trees or a lower ridge, bridges the gap.
Layer and compress. Overlapping ridgelines receding into haze, stacked tight with a telephoto, exaggerate the sense of mass. Both are covered above.
Section 04 | Settings and exposure
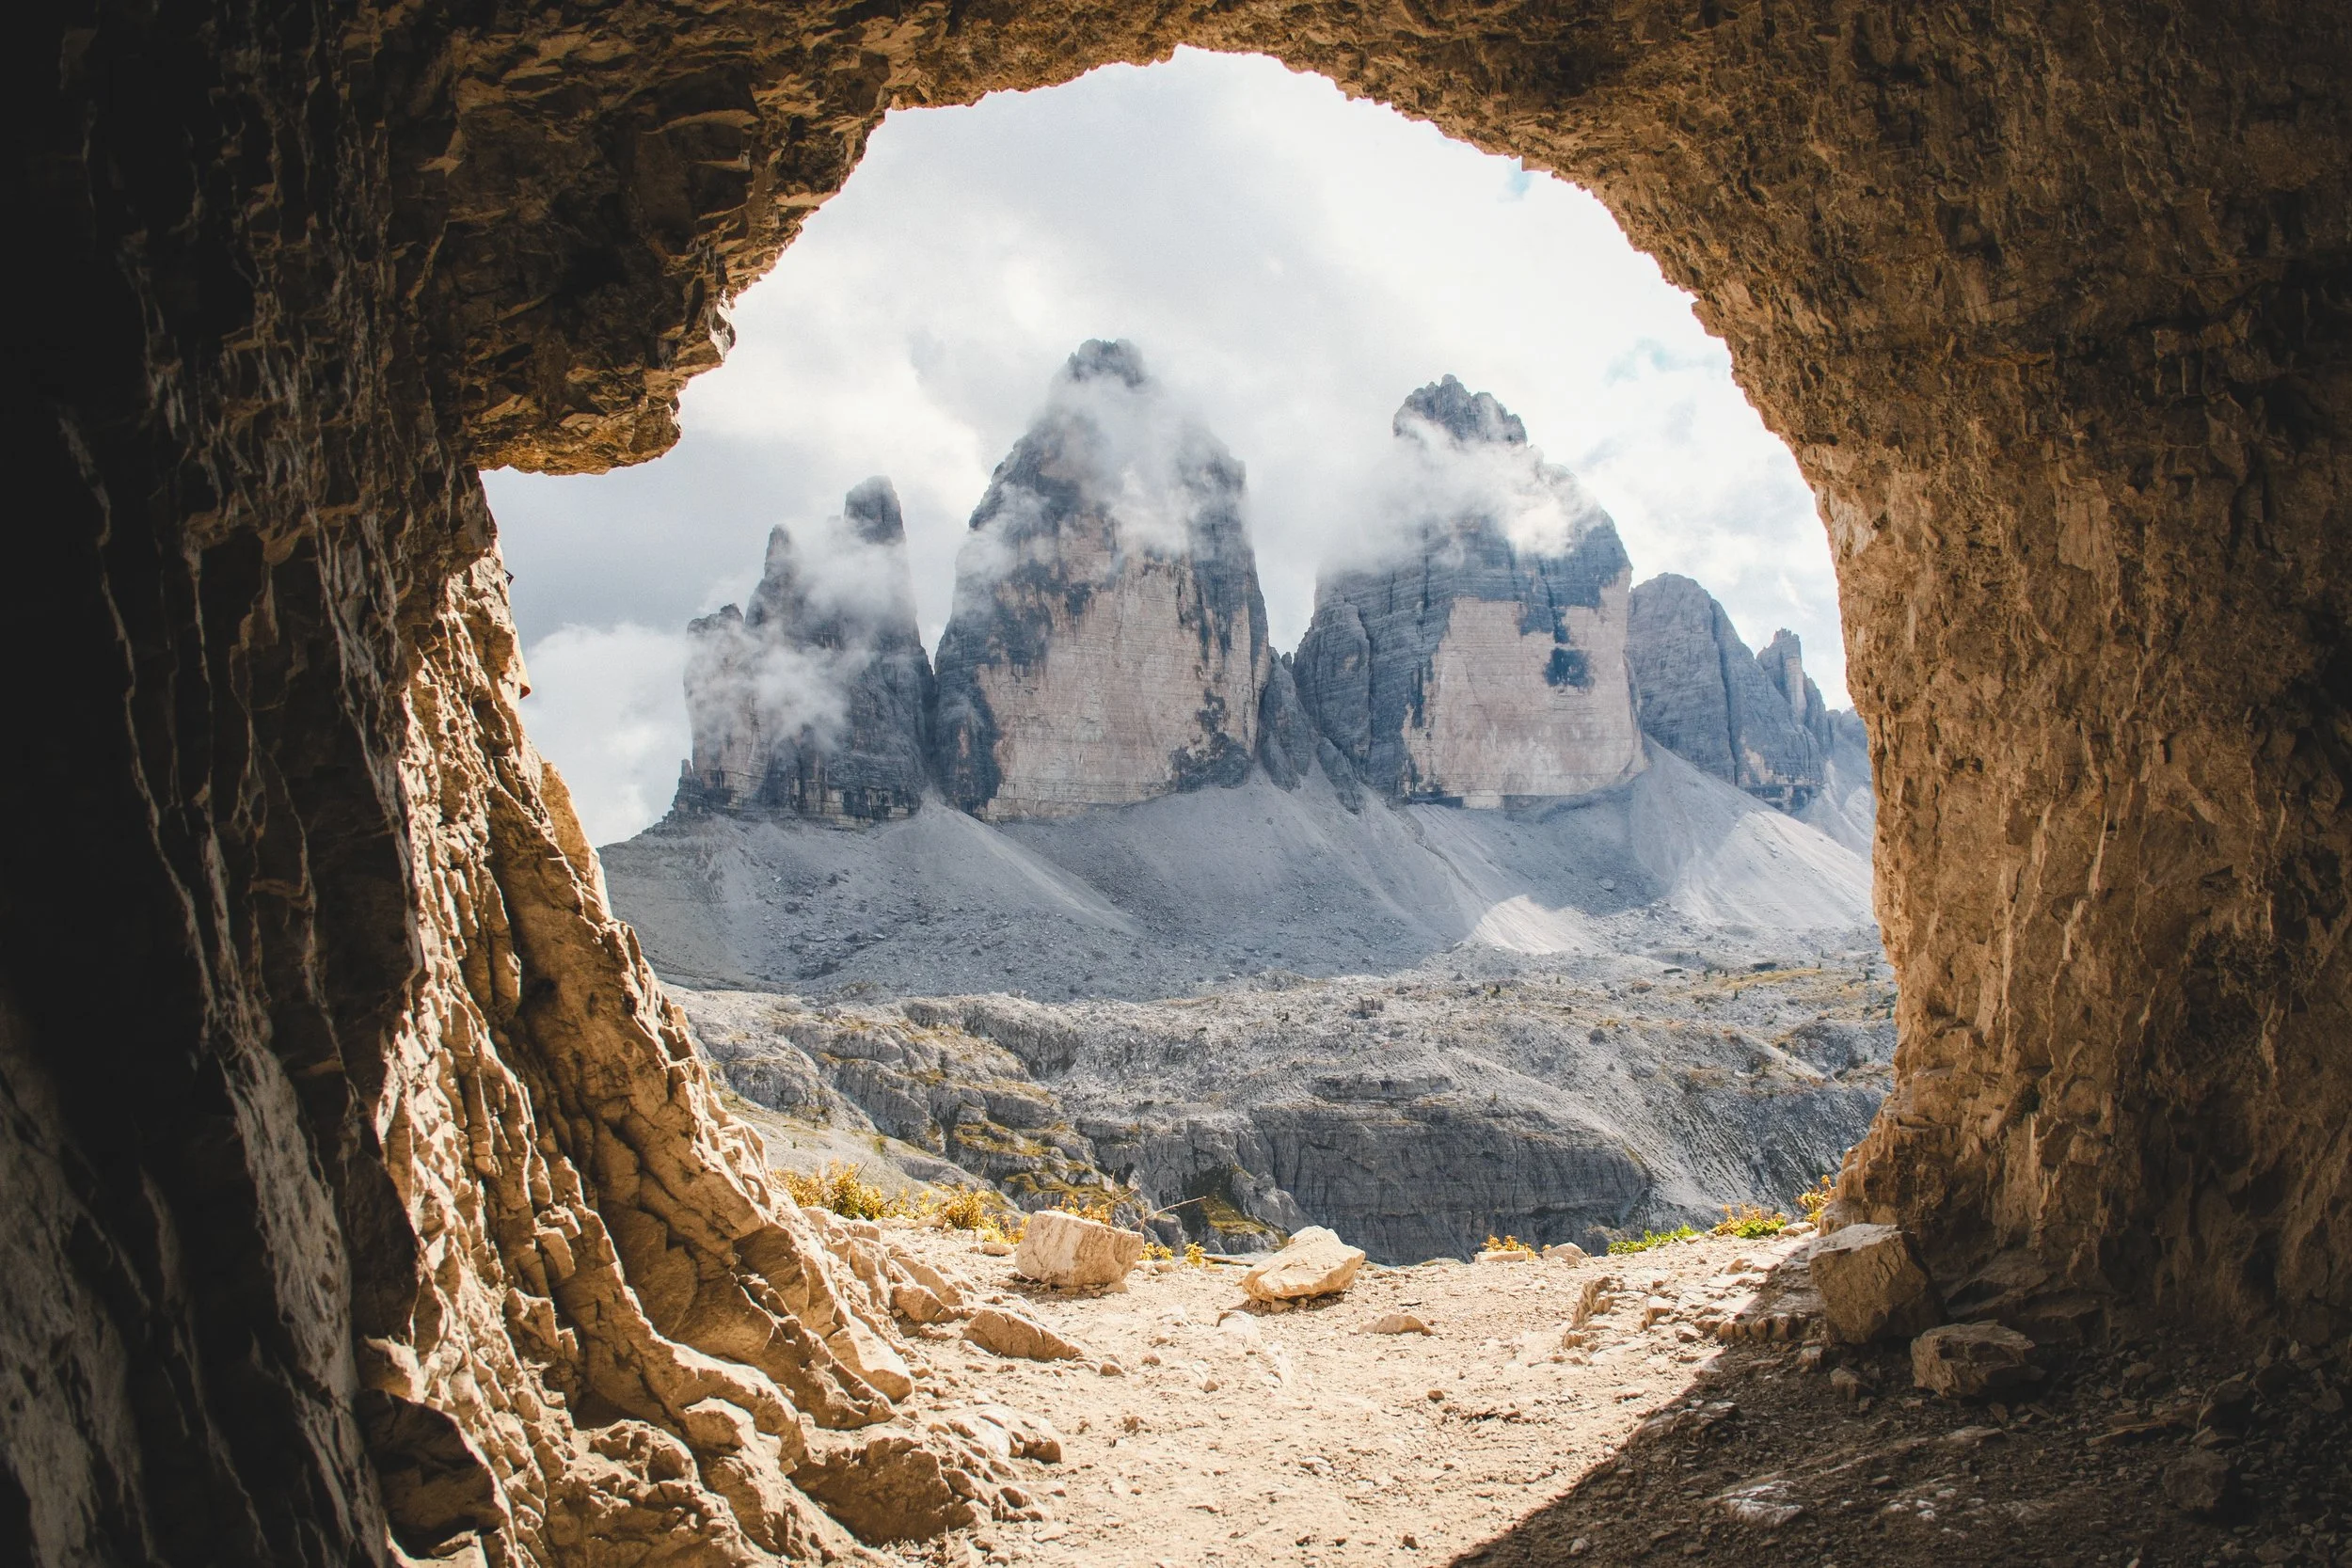
Tre Cime from the caves at Rifugio Locatelli. The cave was dark enough against the bright peaks that a single exposure couldn't hold both, so this is one of the few shots I bracketed and blended. A genuine use for it, rather than a habit.
Fujifilm X-T5 | Reala Ace Film Simulation
The mountains throw one problem at you more than any other: a bright sky above and a dark valley below, a range too wide for the camera to hold in a single exposure. Most of this section is about handling that, plus getting everything sharp from the foreground to the peak.
Understand your sensor before you expose. How you expose depends on what you're shooting. With film, you expose for the shadows, because film holds onto bright areas and you can recover detail from the highlights. Digital is the opposite. Once a digital sensor hits its maximum light level it flatlines, and everything above that point is gone with nothing to bring back. Dark areas are far more forgiving, and you can lift a lot out of the shadows in editing, so with digital it makes sense to avoid clipping the highlights and recover the rest afterwards. Check the histogram rather than the screen, which lies in bright mountain light: if the graph is piled against the right edge, you're losing the highlights, so bring the exposure down until it sits inside the frame.
The caveat is editing. Protecting the highlights only makes sense if you're willing to edit, because you're deliberately capturing a darker file to lift later. If you're after a great photo straight out of camera with little processing, the opposite often serves you better: expose brighter, even if it means losing some detail in the highlights, and you get a more finished-looking image in the moment. It's a trade between a flexible file and a photo that's closer to done when you press the shutter.
And a blown-out sky isn't the disaster it's made out to be. People stress far too much about holding every scrap of highlight detail, as though losing any information in the cloud structure ruins the shot. It doesn't. A sky that clips out because you exposed for the foreground and the mountain can look completely fine, and often I prefer it. What I can't stand is the over-controlled HDR look, where every part of the scene is dragged into the same narrow band of brightness. The dynamics of the light get so flattened that it stops looking real, and to my eye it's the least artistic thing you can do to a landscape. A clean exposure with an honestly bright sky beats a technically complete one that looks fake.
Bracket for the situations that genuinely need it. Sometimes the range really is too wide to hold in one frame and you want all of it, a sunrise where you care about both the colour in the sky and the detail in the shadowed valley below. For those, take several frames at different exposures and blend them later. But this is the technique that most easily tips into the over-processed look, because the whole point is compressing a huge range of brightness into one image, and it's easy to push that until the light stops behaving like real light. So use it deliberately and keep the blend subtle. My own opinion is that if you're relying on it for a photo to work, you're probably overdoing it. The dynamics in my non-bracketed shots almost always end up nicer than anything I've produced by bracketing, so I treat it as an occasional tool rather than a habit.
If you buy one thing that will actually make a difference, get a graduated ND. A grad ND darkens the bright sky while leaving the land untouched, balancing the scene in-camera so you lean less on recovery afterwards. In my opinion it's a far better way of controlling the dynamics of a scene than bracketing: you're holding the range back in-camera, in one frame, rather than compressing several exposures together afterwards and risking that flat, over-processed look. It's one of the more useful filters in the mountains and gets badly overlooked, largely because it's harder to get hold of than people expect. Most filters you'll own are circular ones that screw onto the front of the lens, and a graduated filter doesn't really work that way, since you need to slide the transition up and down to place it against the horizon. That means a square or rectangular filter in a slot-in holder, a bit more kit and a bit more faff, which is why most people never bother. It's most effective when the horizon is roughly level, less so on a jagged skyline where the dark band cuts across a peak. Worth the hassle. (Buy Here)
Get it sharp front to back. Landscapes usually want everything in focus, foreground to distant peak. Stop the lens down to around f/8 to f/11, which is where most lenses are sharpest and gives you the depth of field to hold both. Focus roughly a third into the scene rather than on the far peak, and that depth will carry front to back. If the foreground is very close and you can't hold both ends, take one frame focused near and one focused far and blend them, the same idea as bracketing but for focus.
Use as high an ISO as the shot allows, not as low as you can force it. Bear with me on this one, my background's in physics and ISO is one of the few bits of photography where that's any use, so I get a little carried away with it. It's one of the most misunderstood settings there is, and the usual advice has it backwards. Here's what's actually going on and what you need to take from it.
Noise is mostly set by how much light the sensor collects, and that comes from your aperture and shutter, not ISO. In a landscape you've usually fixed both already, the aperture for sharpness and the shutter to avoid blur, so the light you're collecting is decided and so is the noise. ISO doesn't gather any more light. It only sets how bright the file comes out.
So the question isn't how to keep ISO low, it's how to get the brightest clean exposure from the light you've got. Raise ISO as far as it takes to expose correctly, up to just before the highlights clip. A properly exposed file at a higher ISO holds cleaner shadows than a dark base-ISO file dragged brighter in Lightroom afterwards. Both are applying gain, but ISO applies it in the camera before the signal is converted to digital, whereas the Lightroom slider applies it afterwards to an already-encoded file, which bakes in more noise. Same brightening, done at a better stage. Getting the exposure right in the camera is simply the better file.
In bright conditions, which is a lot of mountain shooting, this often sorts itself out. Your shutter will already be fast enough to avoid any blur with room to spare, so the ISO that correctly exposes the shot turns out to be base ISO anyway. The point matters most in low light, at dawn, dusk or under heavy cloud, where you might instinctively keep ISO down and end up with a dark file you then have to rescue. In practice all of this is what auto ISO does for you, and it's the right call about 95% of the time, as long as you're the one choosing aperture and shutter and letting the camera set ISO to match. The exception is when you want a slow shutter on purpose, a long exposure on water say, where you're setting shutter for the effect and will pull ISO back down to suit.
Carry a tripod only for the shots that need it. A tripod earns its place for low light, long exposures and careful panoramas, where a steady camera matters. Away from those, in good light with a fast enough shutter, you'll be handholding most of the day, and modern stabilisation covers a lot. Bring it for the shots that need it rather than feeling you have to use it for everything. (Buy Here)
A polariser for lakes and the sea. A polarising filter cuts glare and surface reflection, and it's the one filter I'd always carry in the mountains. It's at its best on water: it brings out the colour and depth in those vivid alpine lakes, and it does the same for sea shots, by cutting the reflection off the surface. Rotate it and watch the effect change, then set it where it looks right. The one thing to know is that it costs you a stop or two of light, so factor that into your shutter speed, or let auto ISO take care of it. (Buy Here)
Section 05 | Creative choices
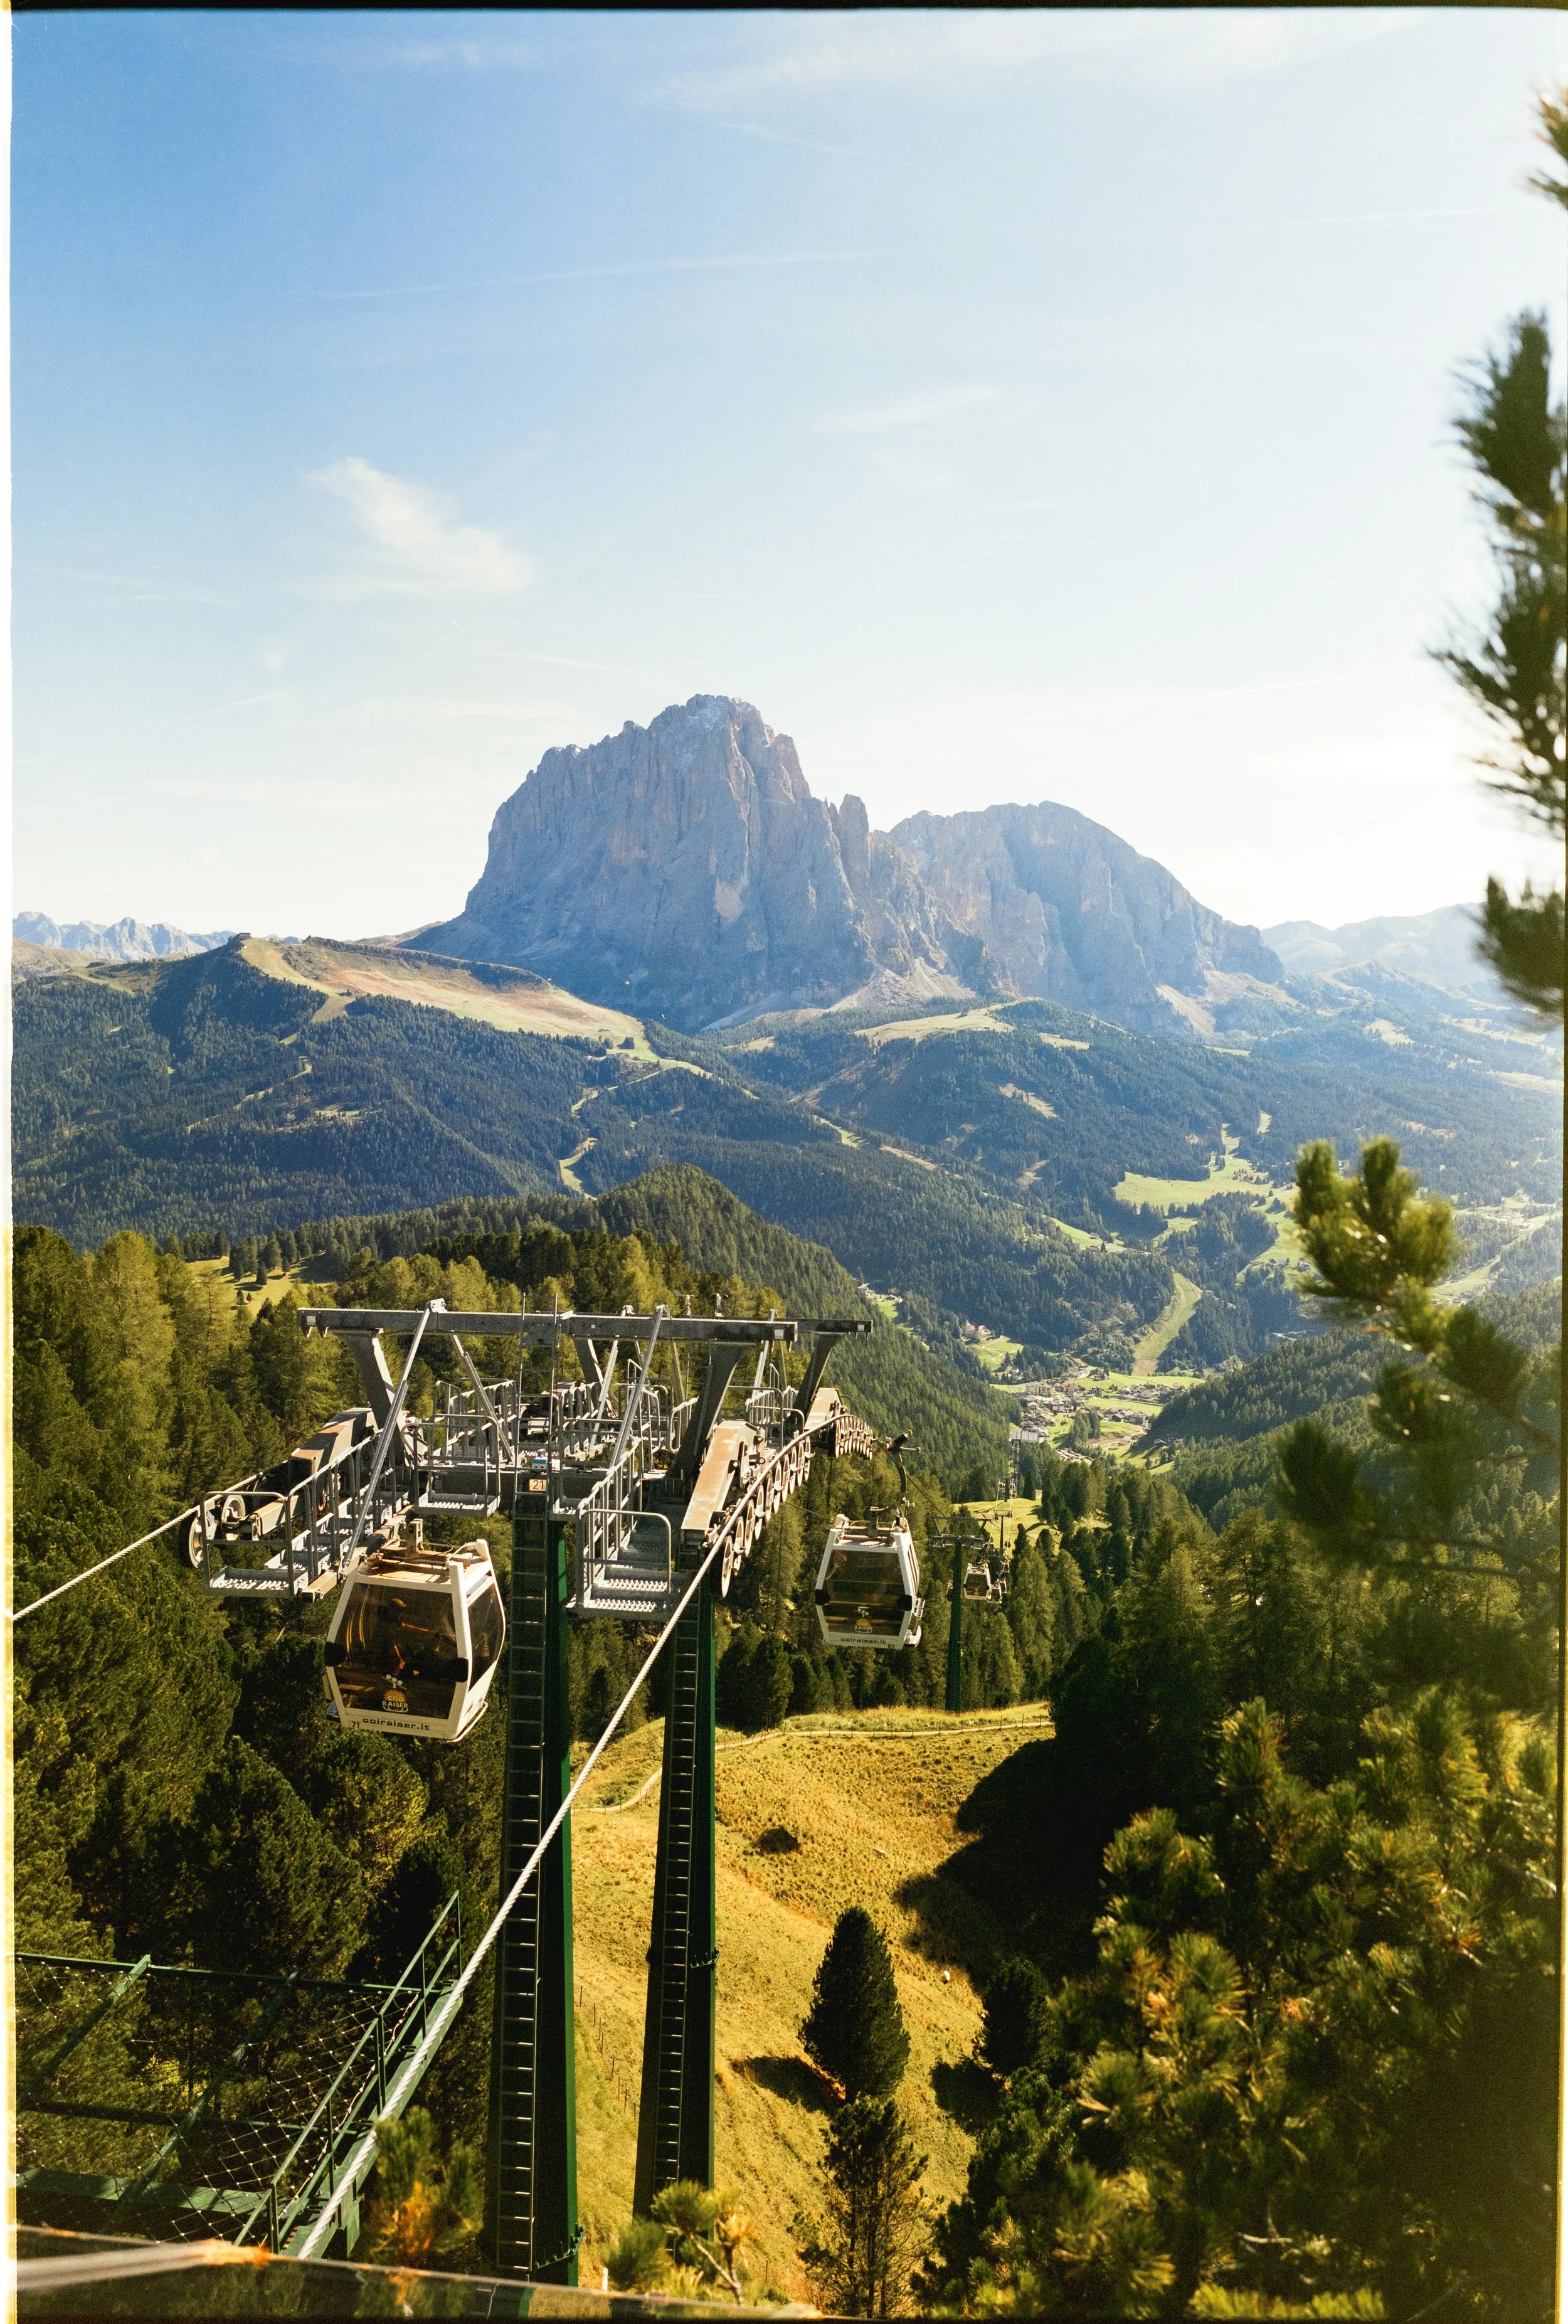
Shot on film in harsh midday light, the flat conditions section 1 warns about. Rather than fight it, I leaned on what still worked: the warm colour, and the gondola cables running up as leading lines to carry the eye toward the peak. Composition and colour doing the job the light wouldn't.
Fuji GSW690 | Fujicolor Pro 400H
The last few sections were mostly about getting a clean, well-composed frame. This one is about the choices that give a photo its character, and they're made when you shoot rather than afterwards.
Try black and white. It sounds odd in a landscape known for colour, but a lot of mountain scenes work as well or better in monochrome, and shooting it is one of the better ways to improve. It's the same idea as the prime lens point in my camera guide: taking a variable away forces you to get the others right. With no colour to lean on, the photo lives or dies on contrast and composition, so you're pushed to think harder about both. Beyond that, black and white can rescue a frame that colour has let down. The flat, hazy midday shots from section 1, white sky and dead light, often come alive in monochrome because they stop depending on colour they never had. The Grohmannspitze frame earlier is one of those. I shoot with the Acros film simulation on the Fuji when a scene might suit it, so I can see the monochrome version in the moment rather than guessing and converting later.
Shape the colour at capture. My approach leans on getting the look right in the camera rather than building it afterwards. On Fuji that means the film simulations, and I shoot most of my mountain colour work on Reala Ace, which gives natural colour and gentle contrast that suits the landscape without much intervention from me. In fact a lot of the time I don't touch the raw file at all, I just edit the jpeg straight out of the camera, because I love the look Fuji gives me and there's little I'd want to change. Even when I do keep the raw, having the simulation applied means I'm seeing something close to the finished photo as I shoot, which shapes the decisions I make in front of the scene and leaves far less to do later.
Lean on composition when the light won't help. Harsh light and flat conditions are where composition earns its keep. When the light isn't giving you drama, a strong, simple composition can carry the photo on its own, and hard light is a good moment to play with things you might not otherwise. Symmetry works especially well here: a bold, almost basic composition, something centred and deliberate, holds up under flat or harsh light where a subtler frame would fall apart. It's the same thinking as the black and white point, leaning harder on the elements that still work when one of them, in this case the light, has been taken away.
Shoot fewer frames than the camera lets you. Digital gives you effectively unlimited shots, so it's easy to fire off a dozen at a scene and sort it out at home. I've found the opposite more useful. The GSW690 is medium format film, eight frames to a roll, and I shot only around thirty across a two-week trip, so every frame had to earn taking. That forces you to slow down and commit to a composition instead of spraying and hoping. You don't need to shoot film to take the lesson from it. Treat a handful of shots at each location as your considered frames and the rest as exploration, and the considered ones tend to come out better for the discipline.
Because all of this happens when you press the shutter, the file you bring home is already most of the way to finished. That's the right frame of mind for the last section: how much editing to do, and how much to leave alone.
Section 06 | Editing
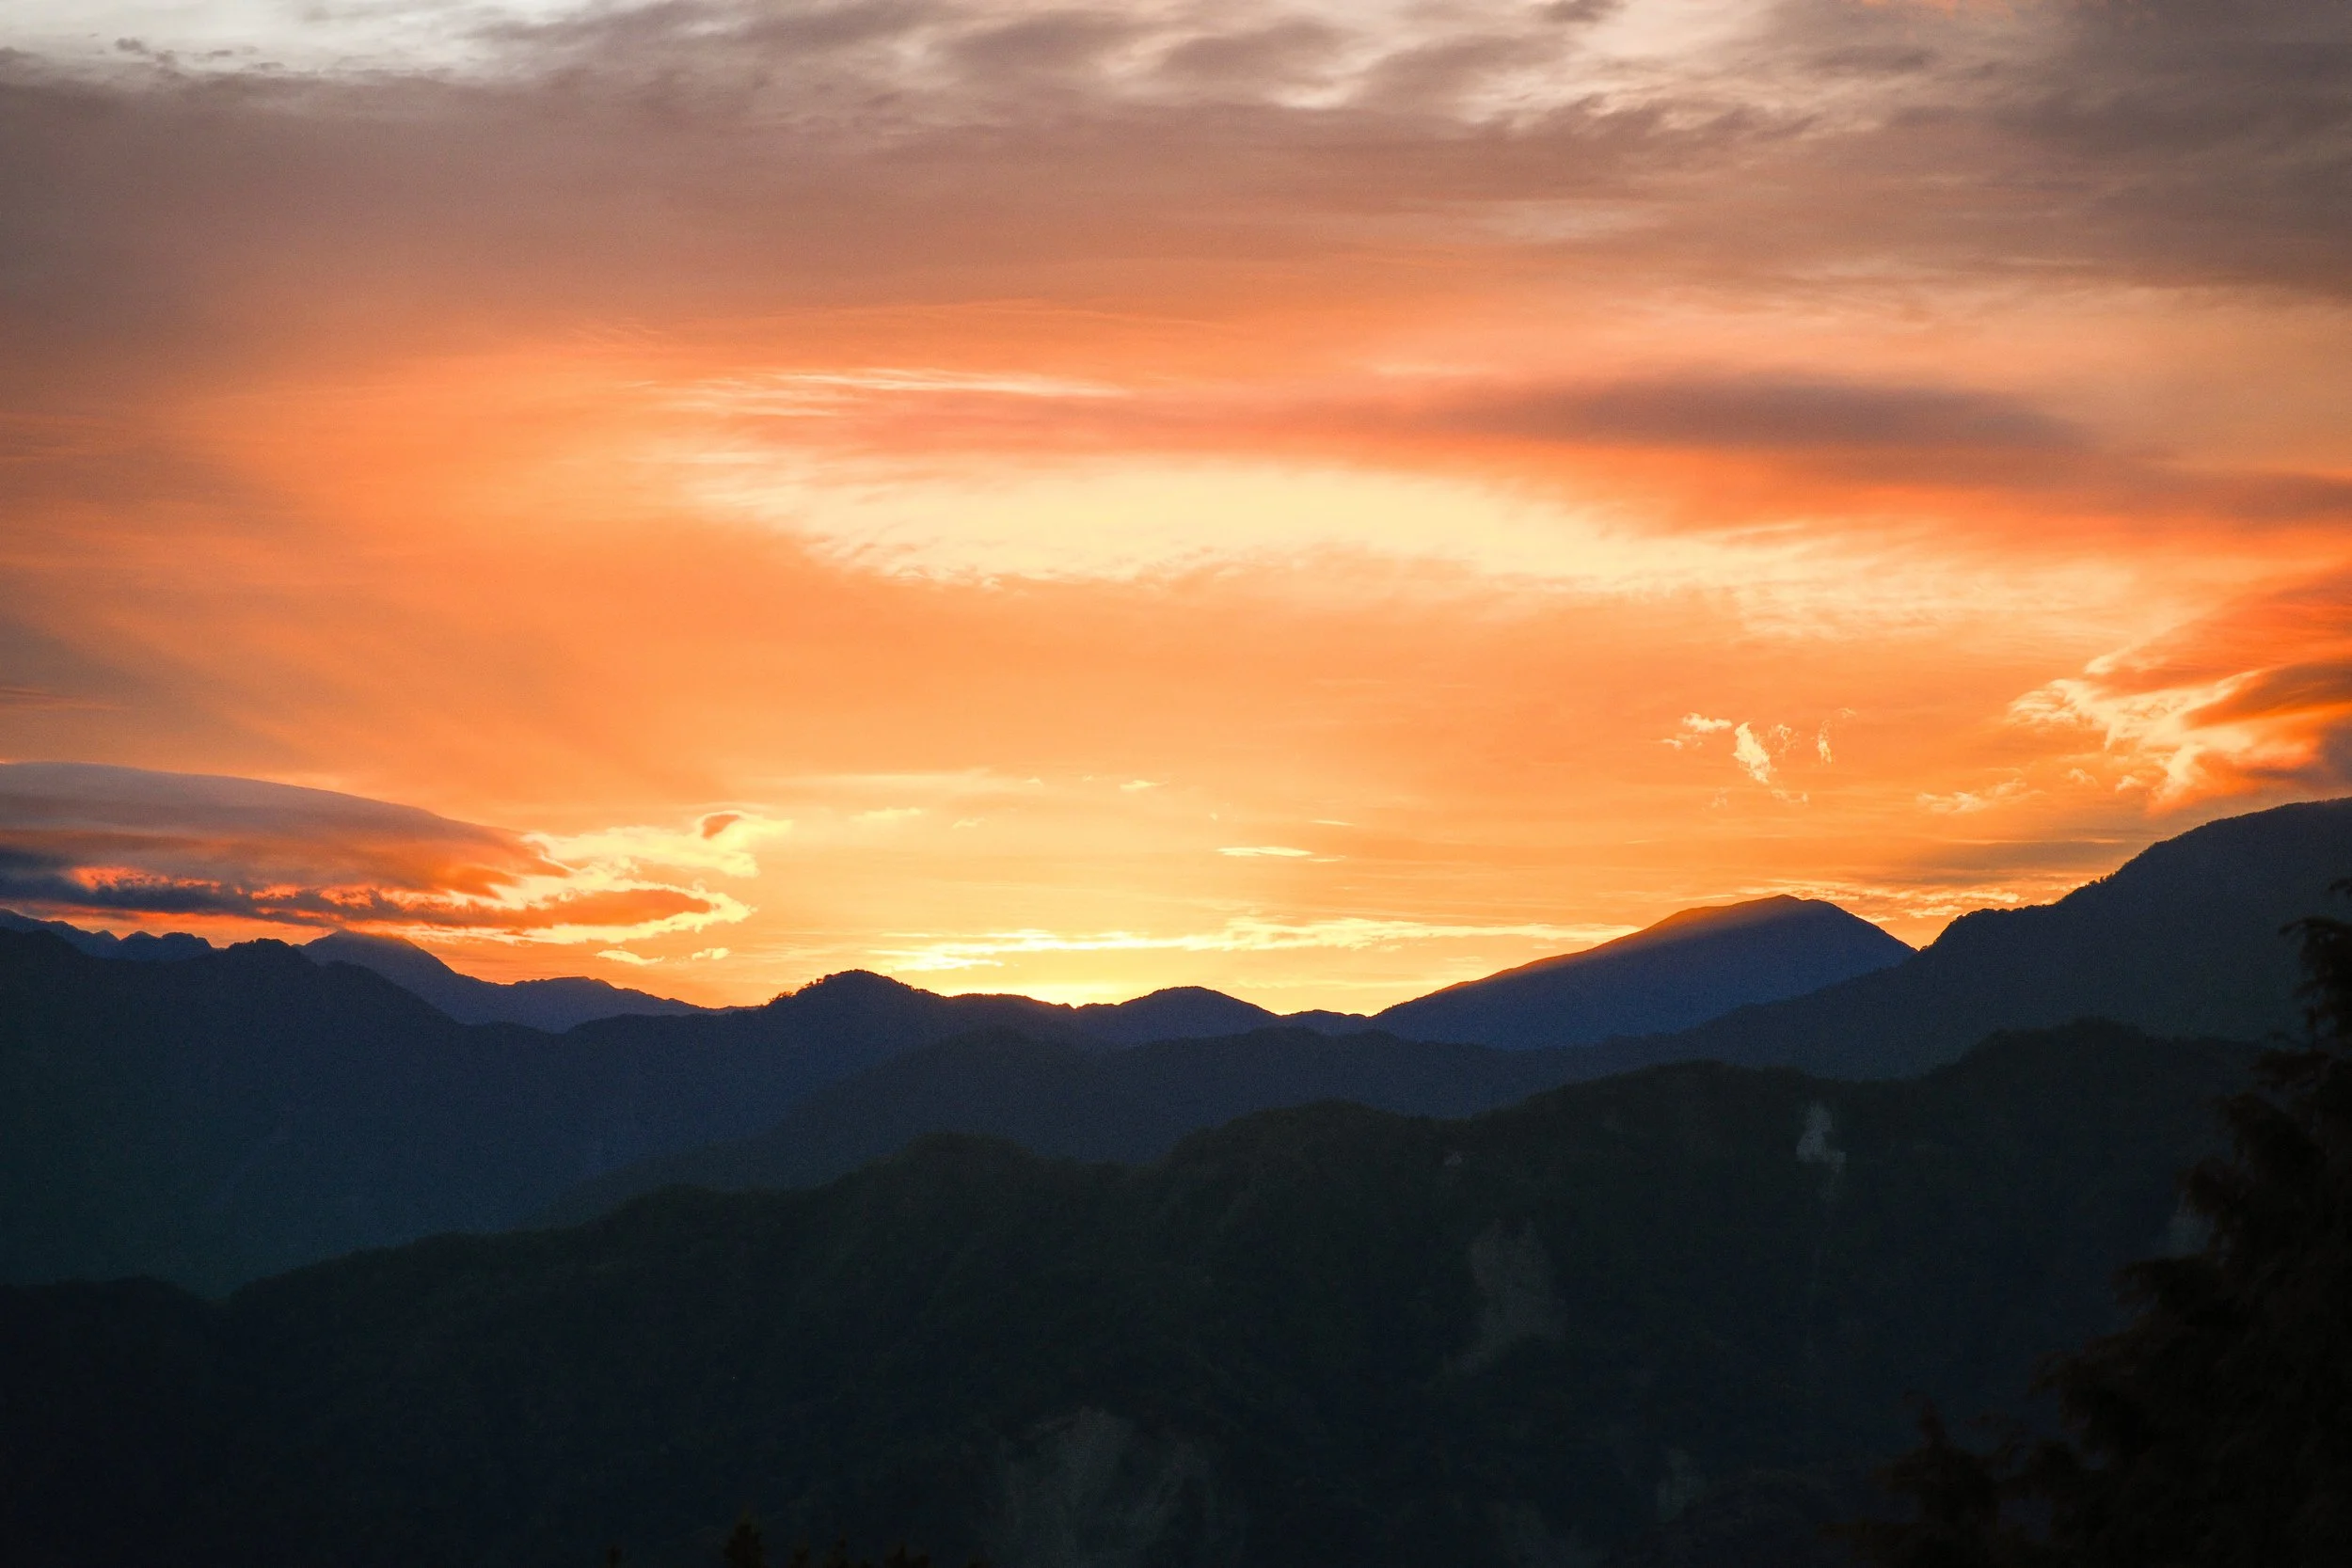
A sunset where I left the foreground in silhouette on purpose. The shadows could be lifted to show detail in the land, but it would be the wrong call: the silhouette is what makes the shot, and recovering it just because you can would flatten the drama the light gave.
Fujifilm X-T5 | Reala Ace Film Simulation
Everything so far has been about getting as much right as possible in the camera, which means by the time a mountain photo reaches editing it shouldn't need much. The scene already had the drama. The job here is to bring back what the camera couldn't quite hold, not to invent something that wasn't there.
Start by recovering, not adding. A short list covers most mountain shots: pull the highlights back if the sky is too bright, lift the shadows so the valley isn't a black mass, set the white balance, a little contrast, straighten the horizon, and clear any obvious distraction. That's usually it. If you've exposed well, most of this is minor, and a lot of my files, especially the Fuji jpegs, barely need more than a nudge. The instinct to keep reaching for sliders after the photo already works is the thing to resist.
Know how a mountain photo gets wrecked. Almost all of it comes from pushing too far in the same few places:
Skies dragged past believable. Over-saturated blues and oranges that were never in the sky. The most common tell, and the quickest way to make a photo look fake.
The HDR look. Shadows and highlights crushed into the same narrow band so nothing is dark or bright any more. It flattens the light that gave the scene its shape, which is the whole point of section 4. Realistic dynamics beat complete ones.
Oversharpening. Turns rock crunchy and edges brittle. A little adds bite, a lot looks digital.
Heavy noise reduction. Smears the fine detail out of distant peaks and foliage until everything goes waxy. Often worse than the noise it's removing.
Don't dehaze the atmosphere away. This is the one I'd single out. Back in section 2, the haze between ridgelines was doing real work, separating the layers and giving the scene its depth. The dehaze slider is the first thing most people reach for, and dragging it up strips exactly that atmosphere out, flattening the distance you wanted to keep. A touch can add clarity. Pushed hard it removes the thing that made the photo feel deep. Use it sparingly, if at all.
Panorama stitching is the one heavier edit worth doing. This is the exception, a constructive edit rather than a corrective one. The overlapping frames from section 3 stitch together in Lightroom or dedicated software into a single wide file, and it's straightforward: line them up, let it blend, crop the ragged edges. It's the one place the extra processing genuinely serves the photo rather than dressing it up.
Contrast is the one to get right, and colour is often best pulled back. If there's a single adjustment that makes or breaks a mountain photo, it's contrast. The graphic quality these landscapes have, rock against sky, ridge against valley, comes from contrast, and getting it right does more for the image than anything else in the panel. Colour is the opposite: it's usually better eased back than pushed. Taking colour out is a genuine tool, not just a matter of restraint. With mountains in particular, pulling down the yellows often cleans up a scene, cutting a muddy or overly warm cast and letting the rock and sky read more clearly. It depends on the light you had, so it's not a fixed move, but reducing a colour is as valid an edit as adding one, and reaching for less saturation rather than more is usually the right instinct up here.
Restrained doesn't mean untouched. To be clear, editing with restraint isn't the same as not editing. My own files aren't straight off the sensor. I work in Lightroom, and every frame gets its exposure adjusted at least. The odd one gets more: a more aggressive curve, some highlight recovery, or work on the colours. The point isn't to avoid editing, it's to edit with intent: every adjustment should be recovering or refining something real in the scene, rather than manufacturing drama the light didn't provide.
And decide what you actually like. One worth saying plainly, because it comes up a lot: a final export with some genuinely overexposed areas is fine. People worry about highlight clipping as though any lost detail is a failure, and I don't shoot that way at all. I probably lean brighter than most, and I'll happily export something technically overexposed because I like the look of it. That's the real point to end on. These are guidelines for getting a strong mountain photo, but it's your art, and part of getting good is working out what you like rather than what you're told you should do. Learn the rules here, then keep the ones that serve the photos you want to make.
Frequently asked questions
What camera settings are best for mountain photography? Aperture around f/8 to f/11 for front-to-back sharpness, and a shutter fast enough to avoid blur when handheld. Set those two first, then let ISO rise to whatever gives you a correct exposure rather than forcing it low, since once aperture and shutter are fixed a properly exposed higher-ISO file beats a dark one brightened later. In practice, auto ISO handles this well as long as you're choosing aperture and shutter yourself. Expose to protect the highlights if you're editing afterwards, or a touch brighter if you want the shot closer to finished straight out of camera.
What is the best lens for mountain photography? For most people a single zoom covering wide to mid focal lengths does the vast majority of the work, and it doesn't need to be fast or expensive, since you'll be stopping down for sharpness rather than shooting wide open. A wide lens suits grand scenes with a strong foreground, while a telephoto is the underused option that compresses ridgelines together and often makes the stronger image.
How do you capture the scale of mountains in a photo? Include something of known size, a person, a building, a lone tree, so the eye has a reference for how large everything else is. Avoid an empty middle distance, use overlapping layers of ridgeline receding into haze, and try a telephoto to compress and exaggerate the sense of mass.
What time of day is best for photographing mountains? The hour after sunrise and the hour before sunset, when low, angled light rakes across the terrain and gives the rock shape and warmth. Midday sun is the flattest and hardest light to work with, so it's best saved for scouting and walking, though a strong composition or black and white can still rescue a midday frame.
Do you need a tripod for mountain photography? Not for most of it. In good light you'll be handholding with a fast enough shutter, and modern stabilisation covers a lot. Carry a tripod for the shots that genuinely need it, low light, long exposures and careful panoramas, rather than feeling you have to use it for everything.
Should you shoot mountains in RAW or JPEG? RAW gives you the most flexibility to recover highlights and shadows in editing, which matters if you're exposing to protect the highlights. That said, if you like the colours your camera produces, and Fuji's film simulations are a good example, editing the JPEG is a perfectly valid way to work, and it's often what I do.